Creating Citizens
A step-by-step guide to spawning, configuring, and managing citizens in your Hytale world using the in-game Citizens Manager UI.
Quick Start
Run /citizens in-game to open the Citizens Manager and create your first citizen.
Citizen Stick
The Citizen Stick is an in-game item that lets you edit any citizen by simply hitting them with it. When you strike a citizen with the Citizen Stick, their Edit screen opens immediately — no need to open the Citizens Manager and find them in the list. This requires the hycitizens.admin permission.
Opening the Citizens Manager
Run /citizens in chat to open the Citizens Manager UI. This is the central hub for everything related to managing your NPCs.
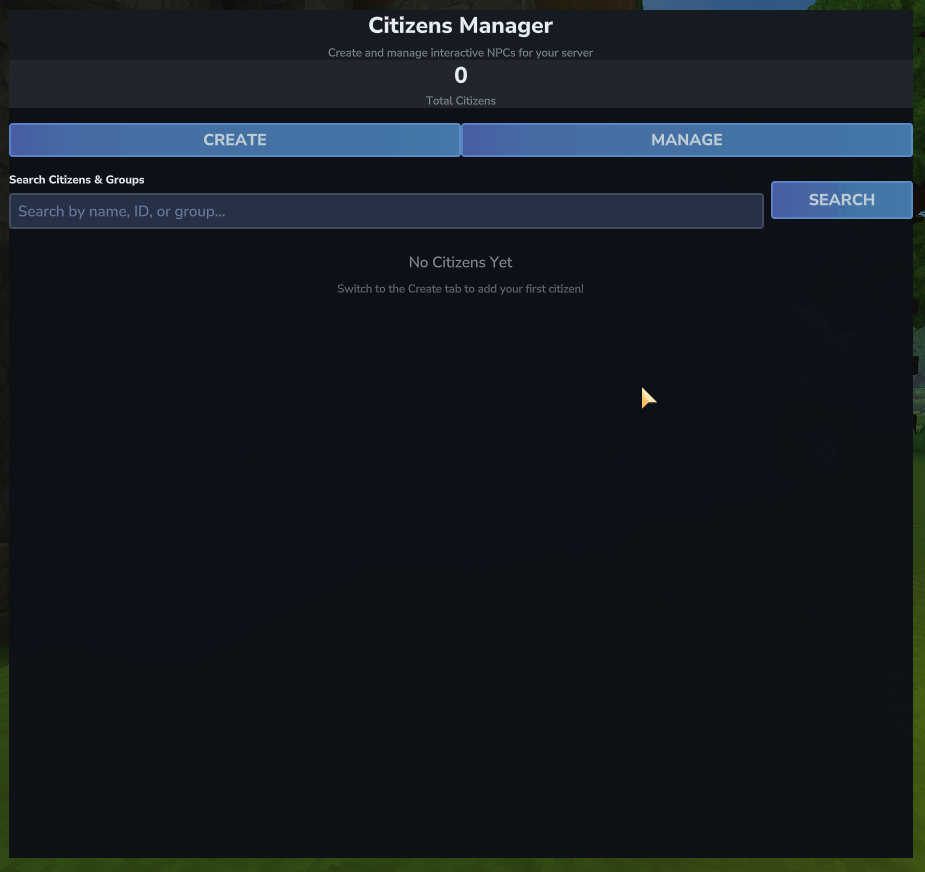
The Citizens Manager has two tabs at the top:
- Create — Start creating a brand new citizen.
- Manage — View, search, edit, clone, teleport to, or remove existing citizens.
The Edit Closest Citizen button lets you instantly open the edit screen for the nearest citizen to your position, without searching through the full list.
Creating a New Citizen
Click the Create tab, then click Start Creating to open the Create New Citizen form. The citizen will be spawned at your current in-game position and rotation when you confirm.
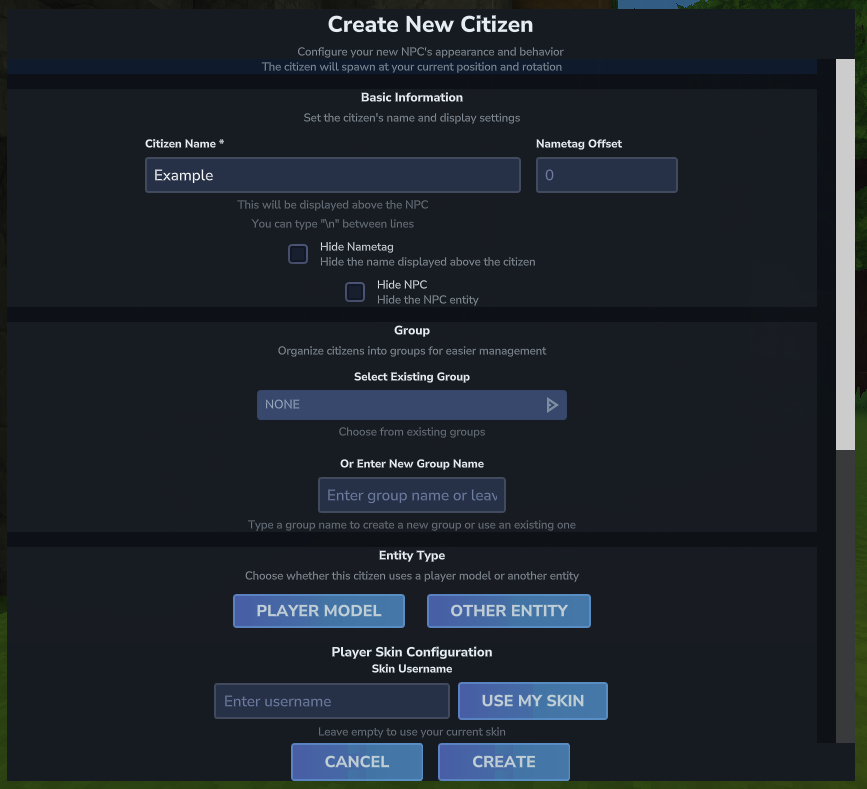
Basic Information
Fill in the citizen's Citizen Name — this is displayed as the nametag floating above the NPC. You can use \n in the name to create multi-line nametags. The Nametag Offset field lets you shift the nametag up or down (useful for large or small entity models).
Two optional checkboxes are also available here:
- Hide Nametag — Hides the floating name above the citizen entirely.
- Hide NPC — Makes the citizen entity invisible (useful for invisible trigger NPCs).
Group
Groups help you organize citizens in the Manage tab. You can select an existing group from the dropdown or type a new group name in the text field. Leave it empty to leave the citizen ungrouped. Groups appear as collapsible folders in the Manage tab. To rename a group, open the group folder in the Manage tab and use the Rename option — this updates all citizens in that group at once.
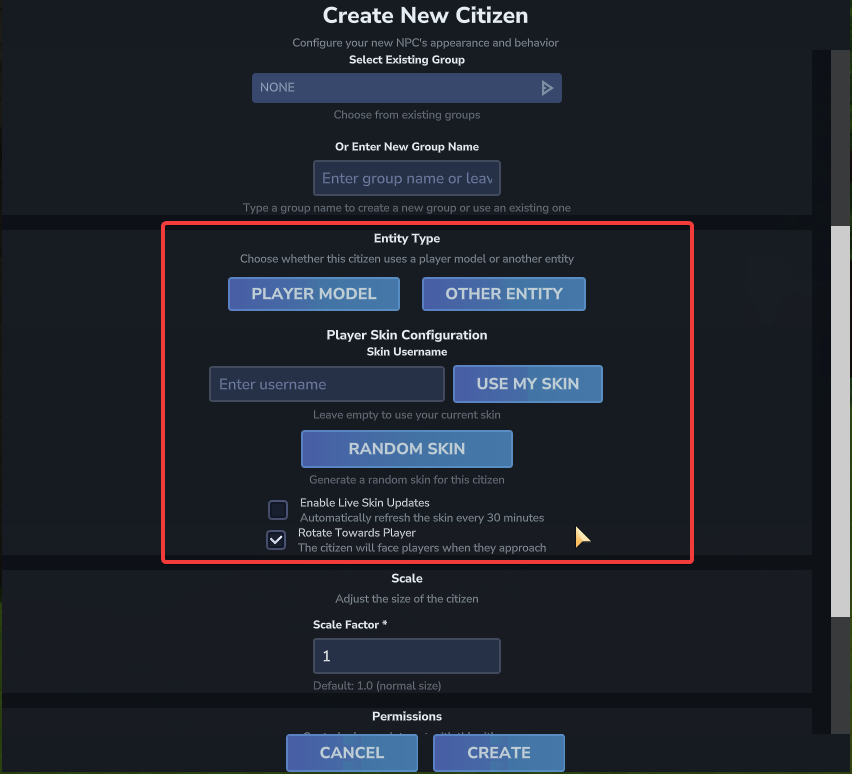
Entity Type
Choose whether the citizen uses a Player Model or another Entity Type.
Player Model
When Player Model is selected, you get several skin options:
- Skin Username — Enter any player's username to use their skin. Leave empty to use your own current skin.
- Use My Skin — Instantly fills in your own username.
- Random Skin — Generates a random cosmetic skin for the citizen.
- Customize Skin — Opens the Skin Customizer UI to manually pick individual cosmetic slots. (Only available when editing an existing citizen.)
- Enable Live Skin Updates — When checked, the skin automatically refreshes every 30 minutes from the username provided. Disable this if you use a custom or randomized skin, as it will override your custom skin.
Other Entity
When Other Entity is selected, you can pick a model from the dropdown list of available entity types, or manually type a model/entity ID in the text field.
Rotate Towards Player
When checked (available for both model types), the citizen will turn to face any player who approaches them. You can configure the distance at which the citizen begins rotating — players further away than this value will be ignored.
Nametag Lines
Click the Nametag Lines button to open the dedicated nametag editor. This menu lets you configure each line of a multi-line nametag individually, with support for color tags and placeholders per line. This replaces using \n in the name field for more complex nametag layouts.
Scale
The Scale Factor controls the size of the citizen model. 1.0 is normal size. Values below 1 shrink the citizen and values above 1 enlarge them. The range is 0.01 to 500.
Permissions
Optionally restrict who can interact with the citizen by entering a Required Permission node. Only players with that permission will trigger messages and commands. You can also set a custom No Permission Message that displays to players who lack the permission.
Required Permission:    citizens.interact.vip
No Permission Message: {RED}You need VIP rank to interact with this citizen!Creating the Citizen
Click Create in the footer to spawn the citizen at your current location. The citizen is saved to mods/HyCitizensData/ immediately.
Managing Existing Citizens
Open the Manage tab to see all your citizens. Citizens assigned to a group appear as group folders — click View on a group to see the citizens inside. You can search by name, ID, or group name using the search bar.
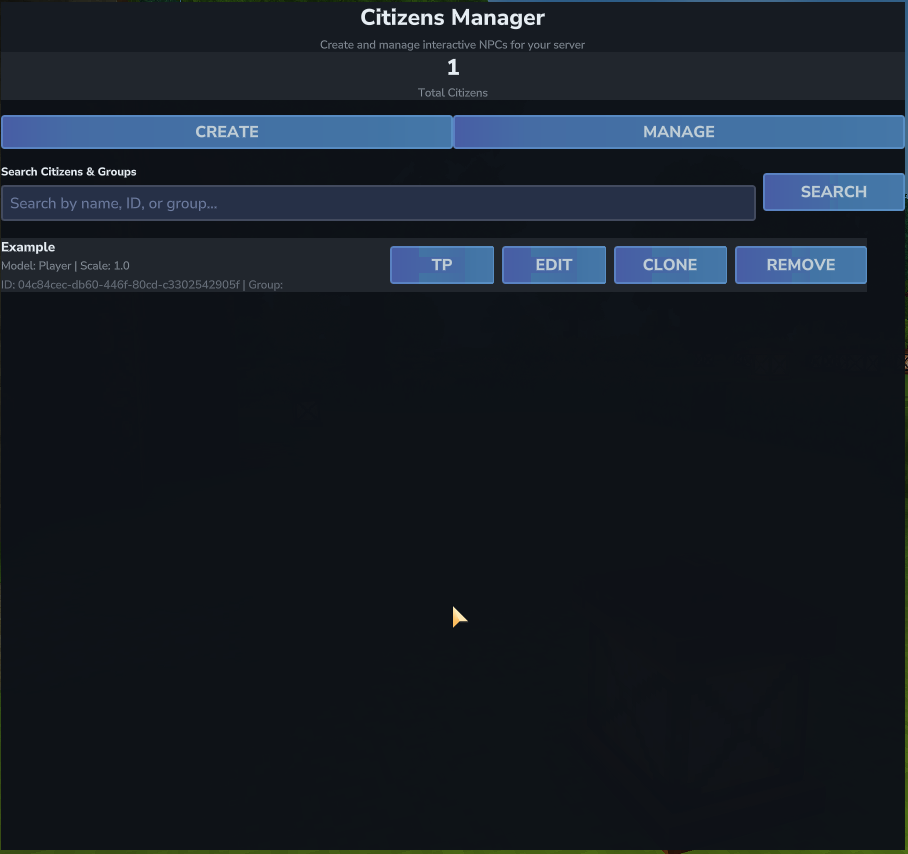
Each citizen entry has four action buttons:
- TP — Teleports you to the citizen's location.
- Edit — Opens the Edit Citizen screen.
- Clone — Creates a duplicate of the citizen at your current position.
- Remove — Permanently deletes the citizen.
Editing a Citizen
Clicking Edit opens the Edit Citizen screen, which has all the same fields as the Create screen (name, group, entity type, scale, permissions), plus a Quick Actions section with five additional buttons:
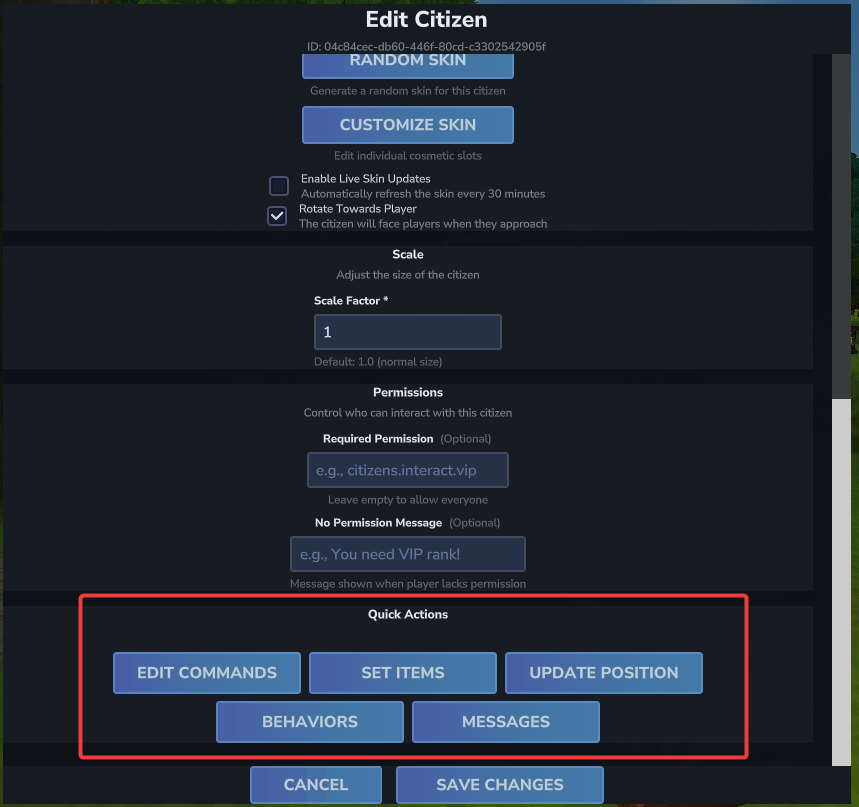
- Edit Commands — Opens the Command Actions editor.
- Set Items — Equips the citizen with whatever items you are currently holding and wearing. This copies your main hand, off-hand, helmet, chest, gloves, and leggings to the citizen instantly.
- Update Position — Moves the citizen to your current standing position and rotation without reopening the full form.
- Behaviors — Opens the Behaviors screen to configure movement, attitude, combat, animations, and more.
- Messages — Opens the Messages editor.
After making changes, click Save Changes at the bottom to apply them.